

How to calibrate a rotary air spray gun?
Calibrating a rotary air spray gun is a crucial process that ensures optimal performance, efficiency, and a high - quality finish in various painting and coating applications. As a supplier of rotary air spray guns, I understand the significance of proper calibration and am here to guide you through the process.
Understanding the Basics of a Rotary Air Spray Gun
Before delving into the calibration process, it's essential to have a basic understanding of how a rotary air spray gun works. A rotary air spray gun uses compressed air to atomize paint or coating material and distribute it evenly onto a surface. The gun consists of several key components, including the air cap, fluid nozzle, and trigger mechanism. The air cap controls the pattern and distribution of the spray, while the fluid nozzle regulates the amount of paint or coating being released.
Pre - Calibration Checks
- Inspect the Gun: Before starting the calibration process, carefully inspect the rotary air spray gun for any signs of damage or wear. Check the air cap, fluid nozzle, and other components for clogs, cracks, or loose parts. A damaged gun can lead to uneven spray patterns and poor coating quality.
- Clean the Gun: Thoroughly clean the gun to remove any paint or debris that may have accumulated during previous use. Use a suitable cleaning solvent and a soft brush to clean the air cap, fluid nozzle, and other internal parts. A clean gun ensures smooth operation and accurate calibration.
- Check the Compressor: Ensure that the air compressor is functioning properly and is providing the correct amount of air pressure. The air pressure is a critical factor in the calibration of the spray gun, as it affects the atomization and distribution of the paint or coating. Check the compressor's pressure gauge and adjust the pressure as needed.
Calibration Steps
Step 1: Set the Air Pressure
The first step in calibrating a rotary air spray gun is to set the correct air pressure. The optimal air pressure depends on several factors, including the type of paint or coating being used, the viscosity of the material, and the size of the spray pattern. As a general rule, start with a lower air pressure and gradually increase it until you achieve the desired atomization and spray pattern.
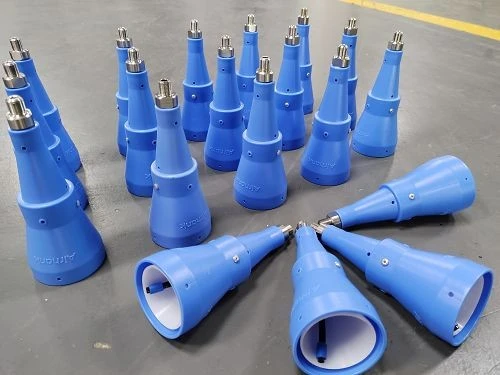
Most rotary air spray guns have an air pressure adjustment knob or valve. Use this to set the air pressure according to the manufacturer's recommendations. For example, if you are using a thin - bodied paint, you may need a lower air pressure, while a thicker coating may require a higher pressure.
Step 2: Adjust the Fluid Flow
The next step is to adjust the fluid flow. The fluid flow determines the amount of paint or coating being released from the gun. To adjust the fluid flow, locate the fluid control knob or valve on the gun. Turn the knob clockwise to decrease the fluid flow and counter - clockwise to increase it.
Start with a small amount of fluid flow and gradually increase it while testing the spray pattern on a test surface. The goal is to achieve a consistent and even spray pattern without any runs or drips. If the spray pattern is too thin, increase the fluid flow. If it is too thick, decrease the fluid flow.
Step 3: Set the Spray Pattern
The spray pattern is another important aspect of calibration. The spray pattern can be adjusted to a round, oval, or flat shape depending on the application. Most rotary air spray guns have an air pattern adjustment knob or valve.
To set the spray pattern, turn the adjustment knob to achieve the desired shape. For example, if you are painting a large, flat surface, a flat spray pattern may be more suitable. If you are painting a small, intricate area, a round spray pattern may be better.
When adjusting the spray pattern, also pay attention to the width and overlap of the pattern. The width of the spray pattern can be adjusted by changing the air pressure or the position of the air pattern adjustment knob. The overlap between consecutive passes should be about 50% to ensure a uniform coating.
Step 4: Test and Fine - Tune
After setting the air pressure, fluid flow, and spray pattern, it's time to test the gun on a test surface. Use a piece of scrap material that is similar to the surface you will be painting. Spray a test pattern on the surface and observe the results.

Look for any signs of unevenness, runs, drips, or overspray. If you notice any issues, make small adjustments to the air pressure, fluid flow, or spray pattern until you achieve the desired results. Remember, calibration is a process of trial and error, and it may take a few attempts to get it right.
Importance of Calibration
Proper calibration of a rotary air spray gun offers several benefits: 1. Improved Coating Quality: A well - calibrated gun ensures a smooth, even, and consistent coating, which enhances the appearance and durability of the finished product. 2. Increased Efficiency: By optimizing the air pressure, fluid flow, and spray pattern, you can reduce paint waste and increase the speed of the painting process. 3. Extended Gun Life: Regular calibration and maintenance help to keep the gun in good working condition, reducing the risk of breakdowns and extending its lifespan.
Additional Tips
- Use the Right Nozzle: Different applications may require different nozzle sizes. Make sure to choose the right nozzle for the type of paint or coating you are using and the size of the surface you are painting. For example, our 50mm Air Spray Gun Nozzle Air Compressor is suitable for a variety of medium - to large - scale painting projects.
- Keep Records: Keep a record of the calibration settings for each type of paint or coating you use. This will make it easier to reproduce the same results in future projects.
- Regular Maintenance: In addition to calibration, regular maintenance of the rotary air spray gun is essential. Clean the gun after each use, lubricate the moving parts, and replace any worn - out components as needed.
Contact for Purchase and Consultation
If you are in the market for a high - quality rotary air spray gun or need further assistance with calibration and maintenance, we are here to help. Our team of experts can provide you with detailed information about our products and guide you through the selection process. Whether you are a professional painter or a DIY enthusiast, we have the right spray gun for your needs. Contact us today to start a purchase negotiation and take your painting projects to the next level.
References
- Painting and Coating Application Handbook, 2nd Edition.
- Air Spray Gun Manufacturer's Manuals.
- Industry Best Practices for Spray Gun Calibration and Maintenance.