

How to arrange the installation space for a pump turbine side channel blower?
As a supplier of pump turbine side channel blowers, one of the most common questions we receive from customers is how to arrange the installation space for these powerful machines. Proper installation space arrangement is crucial for ensuring the optimal performance, longevity, and safety of the pump turbine side channel blower. In this blog post, I will share some valuable insights and guidelines on how to effectively arrange the installation space for a pump turbine side channel blower.
Understanding the Basics of Pump Turbine Side Channel Blowers
Before delving into the details of installation space arrangement, it is essential to have a basic understanding of pump turbine side channel blowers. These blowers are designed to generate high-pressure airflows by utilizing the principle of side channel compression. They are widely used in various industrial applications, such as wastewater treatment, pneumatic conveying, and drying systems.
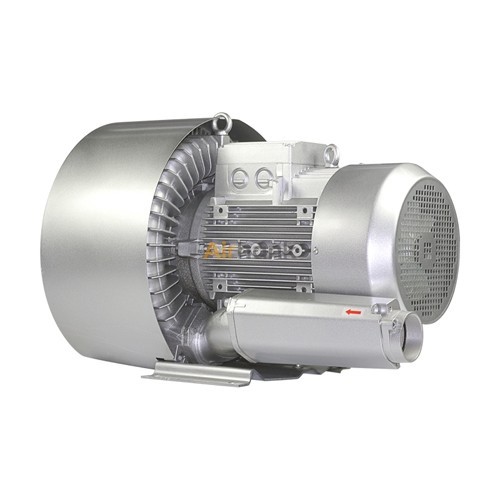
The Pump Turbine Side Channel Blower is a reliable and efficient solution for applications that require high-pressure airflows. It features a compact design, low noise operation, and high efficiency, making it an ideal choice for a wide range of industrial applications.
Factors to Consider When Arranging the Installation Space
When arranging the installation space for a pump turbine side channel blower, several factors need to be taken into consideration. These factors include:
1. Ventilation
Proper ventilation is essential for ensuring the optimal performance and longevity of the pump turbine side channel blower. The blower generates heat during operation, and if the heat is not dissipated properly, it can cause the blower to overheat and malfunction. Therefore, it is important to ensure that the installation space has adequate ventilation to allow for the proper dissipation of heat.
The ventilation system should be designed to provide a continuous supply of fresh air to the blower and to remove the hot air generated during operation. This can be achieved by installing exhaust fans or ventilation ducts in the installation space.
2. Accessibility
The installation space should be easily accessible for maintenance and repair purposes. The blower may require regular maintenance, such as cleaning, lubrication, and inspection, to ensure its optimal performance. Therefore, it is important to ensure that the installation space allows for easy access to the blower and its components.
The installation space should also be designed to allow for the easy removal and replacement of the blower in case of a malfunction. This can be achieved by providing adequate space around the blower and by using removable panels or access doors.
3. Noise Level
Pump turbine side channel blowers can generate a significant amount of noise during operation. Therefore, it is important to consider the noise level when arranging the installation space. The installation space should be located in an area where the noise generated by the blower will not cause a disturbance to the surrounding environment.
If the noise level is a concern, soundproofing materials can be used to reduce the noise generated by the blower. These materials can be installed on the walls, ceiling, and floor of the installation space to absorb the sound waves and reduce the noise level.
4. Floor Load Capacity
The installation space should have a sufficient floor load capacity to support the weight of the pump turbine side channel blower. The blower can be quite heavy, especially when it is fully loaded with air. Therefore, it is important to ensure that the floor of the installation space can support the weight of the blower without any risk of collapse.
The floor load capacity can be determined by consulting the building's structural engineer or by referring to the building's specifications. If the floor load capacity is insufficient, additional support structures may need to be installed to ensure the safety of the blower and the surrounding environment.
5. Electrical Requirements
Pump turbine side channel blowers require a reliable electrical supply to operate. Therefore, it is important to ensure that the installation space has a suitable electrical infrastructure to meet the blower's electrical requirements.
The electrical supply should be properly grounded and protected by circuit breakers or fuses to prevent electrical hazards. The installation space should also be equipped with a dedicated electrical outlet or switch to allow for the easy operation and control of the blower.
Step-by-Step Guide to Arranging the Installation Space
Now that we have discussed the factors to consider when arranging the installation space for a pump turbine side channel blower, let's take a look at a step-by-step guide to help you arrange the installation space effectively.
Step 1: Choose the Right Location
The first step in arranging the installation space for a pump turbine side channel blower is to choose the right location. The location should be based on the factors discussed above, such as ventilation, accessibility, noise level, floor load capacity, and electrical requirements.
The location should also be easily accessible for maintenance and repair purposes. It is recommended to choose a location that is close to the application where the blower will be used to minimize the length of the air ducts and reduce the pressure drop.

Step 2: Prepare the Installation Surface
Once you have chosen the right location, the next step is to prepare the installation surface. The installation surface should be flat, level, and free of any debris or obstructions. If the installation surface is not flat or level, the blower may vibrate during operation, which can cause damage to the blower and its components.
If necessary, the installation surface can be leveled using shims or other leveling materials. The installation surface should also be cleaned and degreased to ensure a good bond between the blower and the installation surface.
Step 3: Install the Blower
After preparing the installation surface, the next step is to install the blower. The blower should be installed according to the manufacturer's instructions and guidelines. It is recommended to use a qualified technician or installer to ensure the proper installation of the blower.
The blower should be securely mounted on the installation surface using bolts or other fastening materials. The blower should also be connected to the air ducts and the electrical supply according to the manufacturer's instructions.
Step 4: Connect the Air Ducts
Once the blower is installed, the next step is to connect the air ducts. The air ducts should be properly sized and installed to ensure the efficient flow of air to and from the blower. The air ducts should also be sealed to prevent any air leaks, which can reduce the efficiency of the blower.
The air ducts should be connected to the blower using flexible connectors or couplings to allow for some movement and vibration of the blower during operation. The air ducts should also be supported by brackets or hangers to prevent any sagging or bending.
Step 5: Test the Blower
After connecting the air ducts, the next step is to test the blower. The blower should be tested to ensure that it is operating properly and that it is generating the required airflow and pressure. The blower should also be tested for any leaks or malfunctions.
The blower can be tested using a pressure gauge or a flow meter to measure the airflow and pressure. The blower should also be tested for any abnormal noises or vibrations, which can indicate a problem with the blower or its components.
Step 6: Conduct Regular Maintenance
Once the blower is installed and tested, it is important to conduct regular maintenance to ensure its optimal performance and longevity. The blower should be inspected and cleaned regularly to remove any dirt, debris, or contaminants that may accumulate on the blower and its components.
The blower should also be lubricated regularly to ensure smooth operation and to prevent any wear and tear on the blower's components. The blower's filters should also be replaced regularly to ensure the efficient flow of air to and from the blower.
Conclusion
Arranging the installation space for a pump turbine side channel blower is a crucial step in ensuring the optimal performance, longevity, and safety of the blower. By considering the factors discussed in this blog post and following the step-by-step guide, you can effectively arrange the installation space for your pump turbine side channel blower and ensure its reliable operation.
If you are interested in purchasing a Pump Turbine Side Channel Blower or need further assistance with the installation and arrangement of the installation space, please do not hesitate to contact us. Our team of experts is always ready to help you find the right solution for your specific needs.
References
- Manufacturer's instructions and guidelines for the pump turbine side channel blower.
- Industry standards and best practices for the installation and operation of pump turbine side channel blowers.
- Building codes and regulations for the installation of industrial equipment.